How To Setup Email in cPanel
Setting up Email Accounts in cPanel
This is part of my Beginners Series on Building a Website
If you are building a new website, you probably need and/or want at least a few email addresses associated with your new website. It is always nice to have a good administration email, to use when administering your website. By having an email just for administration, you won’t have to give out the email name for other purposes. It’s also fun and a good choice to have an email associated with your website for visitors to address comments. Keeping an email address for comments helps to organize your website for easier management. You will also, probably want an email for the business side of the website. You can use the business email for setting up Google Analytics, affiliate programs, themes, plugins and whatever else your website might need.
I am currently using interServer as my Web Hosting Service, so I will use them to illustrate how to set up email accounts in cPanel. The User Interface to get to the cPanel will be different on every host, but once you are in cPanel it will be pretty much the same on any Hosting Service.
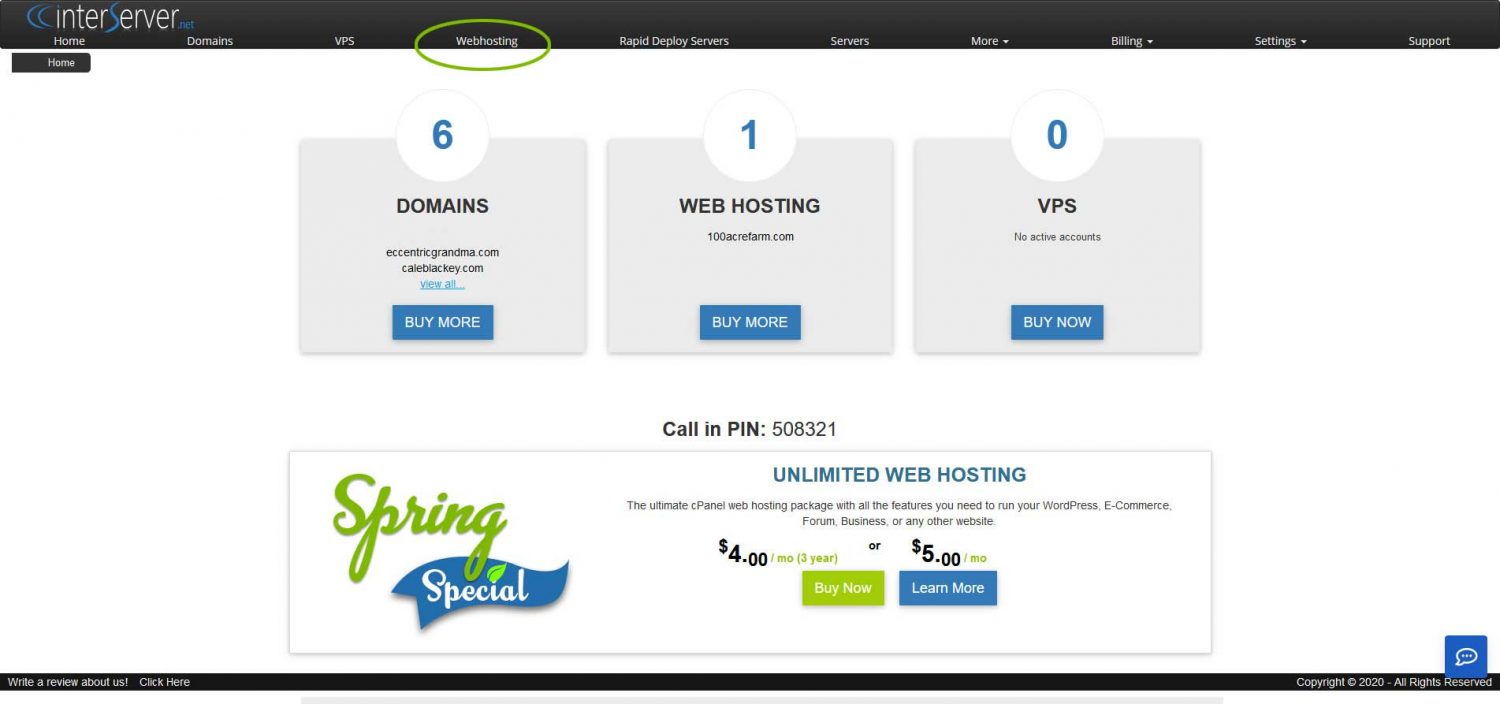
This is the interServer main page.
- Click on the Webhosting link at the top, indicated by the green circle. This will take you into the main hosting account.
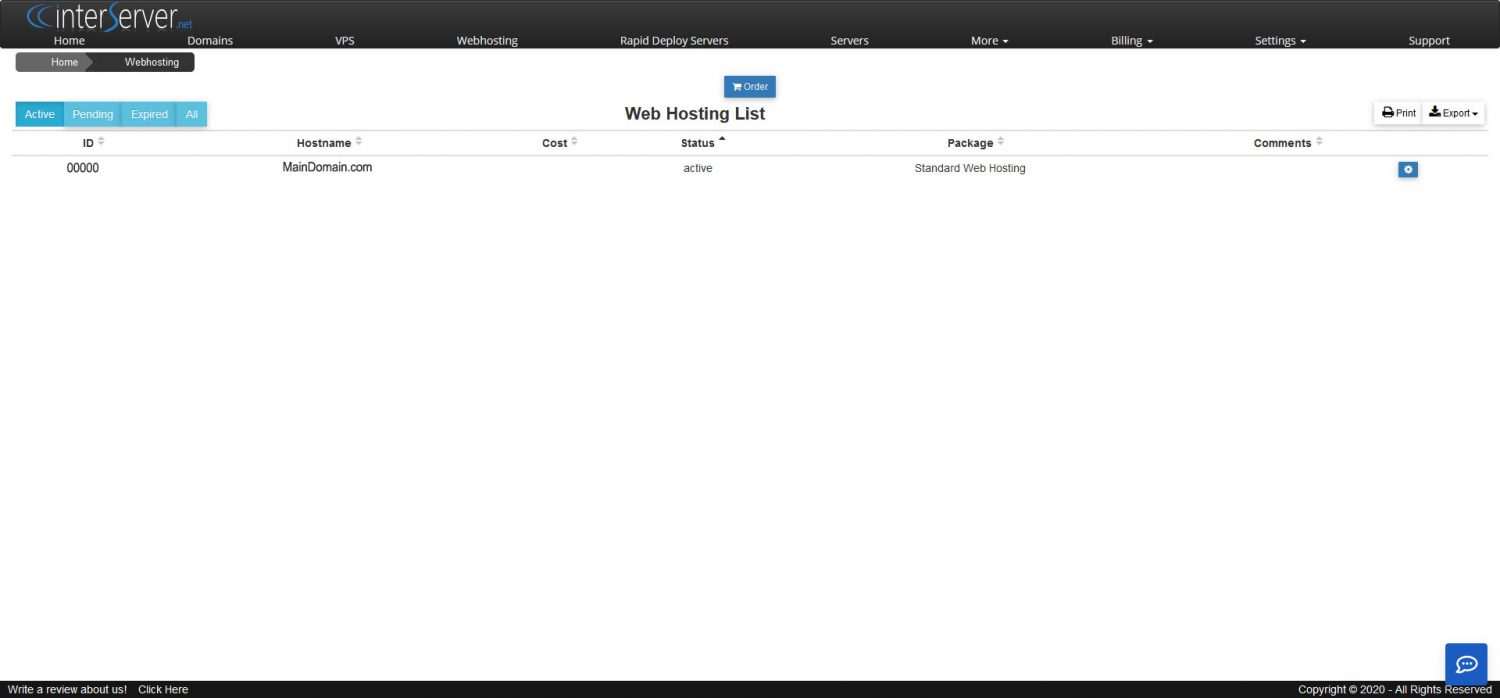
On the main hosting account page you will see only your main domain, the one you used to set up your hosting account. This is where you will go for most of the things that you need to do on the server and this is where you need to go in order to log in to cPanel from the Host Site.
- To get to cPanel, click on the little blue gear to the right of your main domain name.
Note: When you sign up for the Hosting Service you may also be given a URL and password where you can log into cPanel directly.
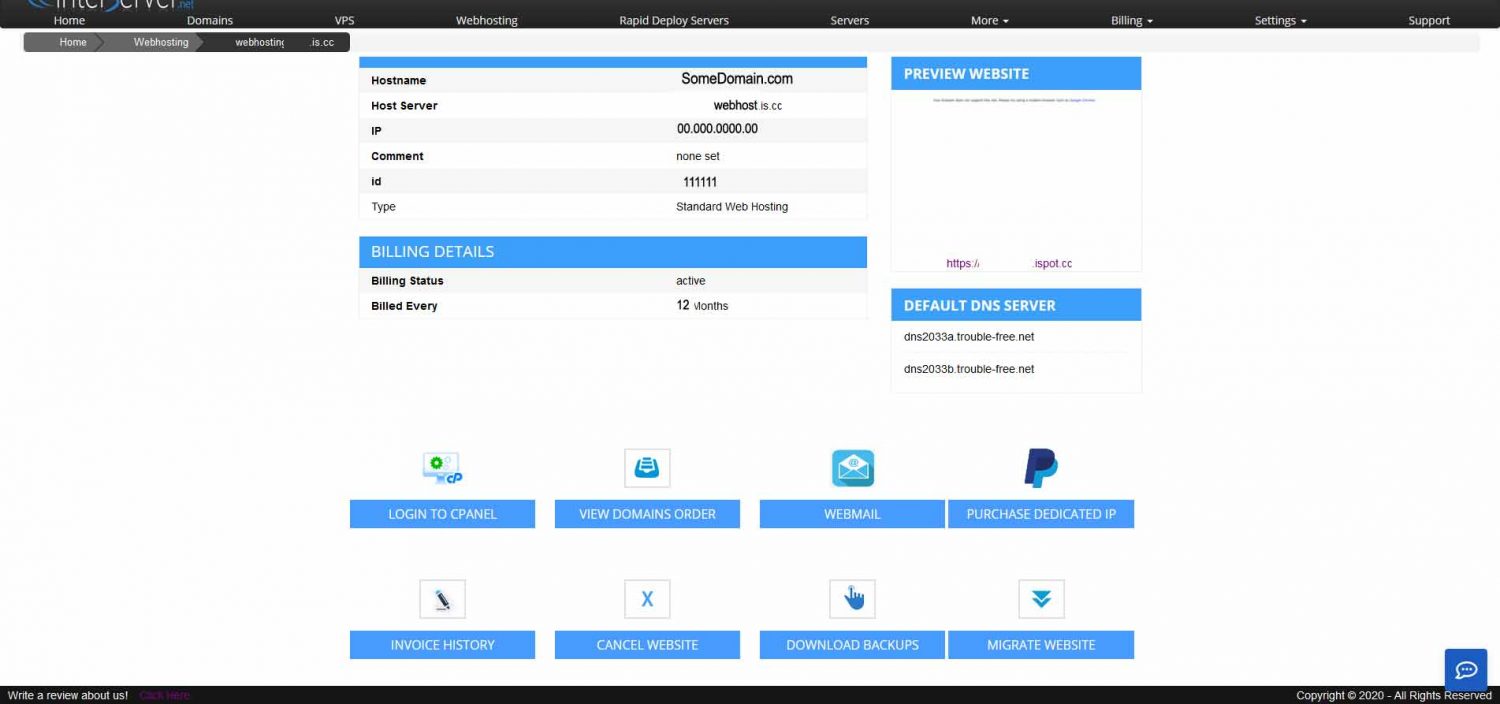
After you click the little gear, you will be taken to your main account page.
- Click on the cPanel button and you will finally be taken to the Main cPanel page.

Once you are in cPanel, you will see lots of options and things to do. Right now, we are only interested in setting up your email accounts.
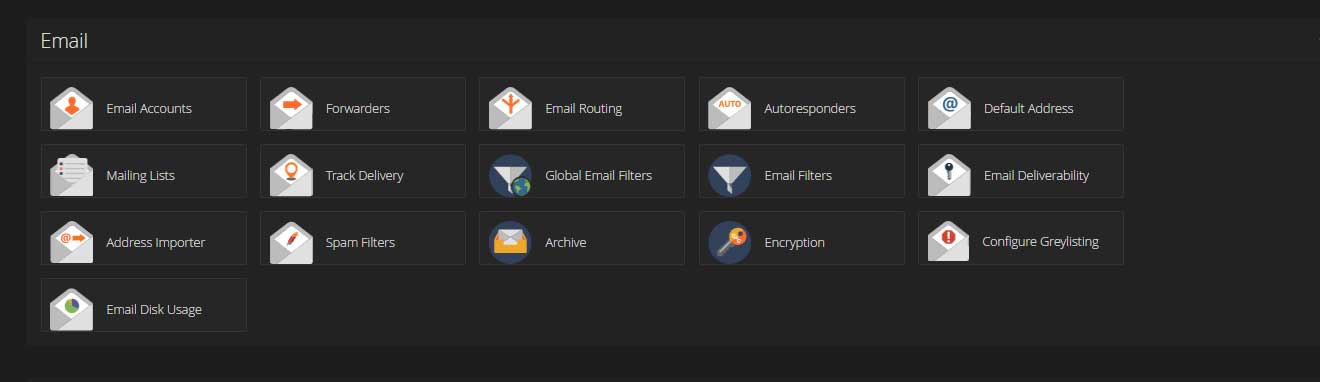
- Scroll to the Email Section
- Press on Email Accounts. It should be the very first option in this section.
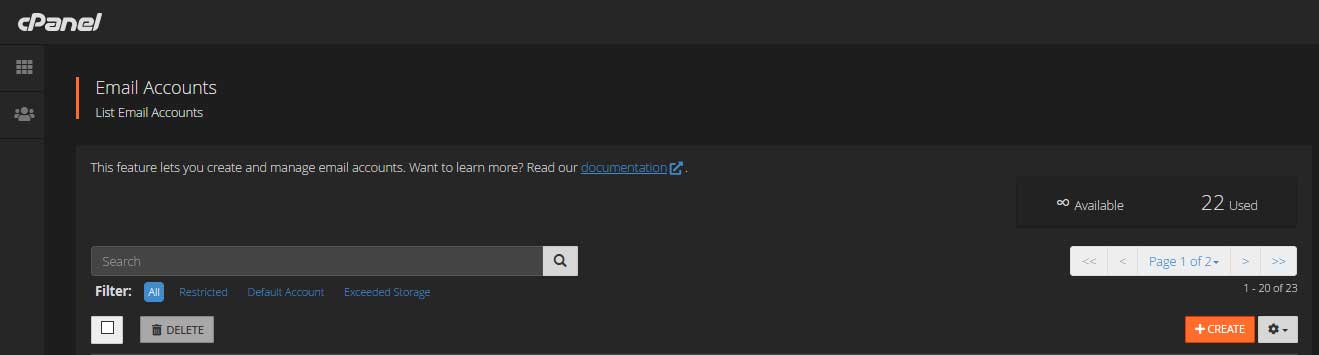
If you have already set up emails on the server, you will see them listed here, but hey, if you already have emails you don’t need this tutorial, so I will presume there are no existing emails at this point.
- Press the +Create button. It is the orange button on the bottom right corner.
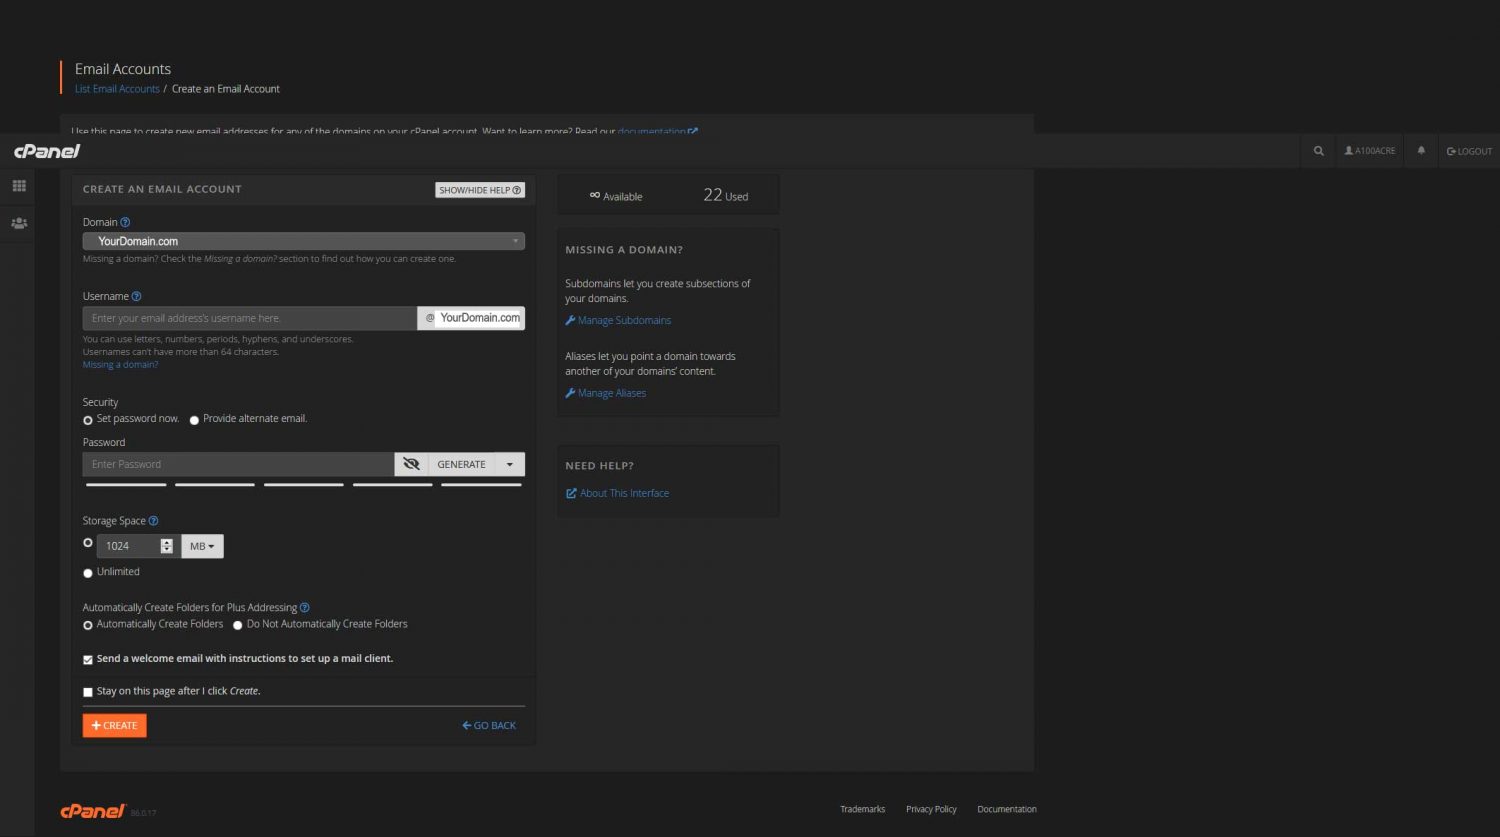
Now we are on the Email Account Creation page. Your domains will be listed in the dropdown menu under Domain.
- Choose the domain you want associated with the email.
- Enter the name you want to use for the email. If this is a general purpose email or a public email, use anything you like. However, if this is the email address you will be using to administrate your website; as an added security measure I wouldn’t use Admin, Administrator or your name. My thoughts are that it should be private and not something somebody could use if they try to hack your site. Potentially, if a hacker were to know the email and hack your password, they could get access to your website, change it around, possibly gain personal information about you and/or your visitors and cause you a lot of problems and stress. My suggestion is to only use that email for administration purposes and only share it on a need to know basis. If you have a good password, a hacker probably can’t get in, but if they don’t know the email address OR the password the chances decrease exponentially.
- Choose a good password or you can provide an alternate email for password recovery. If you provide an alternate email, you will be sent an email at the alternate address to set your password.
- Choose the amount of storage you want for email messages, I usually set mine to unlimited.
- If this is your administration email, you shouldn’t need to create Plus Addressing folders so set that to “Do Not Automatically Create Folders”.
- If it’s not your Administration email address and you think you would benefit from the “Automatically Create Folders”, then go ahead and check it.
- Then check “Send a welcome email with instructions to set up a mail client”. That will verify that the email has been set up and also give you instructions on how to access the email with a mail client such as MSMail, Outlook, Thunderbird, etc.
- If you want to create more emails for the domain, check “Stay on this page after I click Create”.
- Then press create.
Now you have created your first email account in cPanel. If you need more email addresses, you can create as many as you want. To access your email through an email client, just use the information from your Welcome Email and follow the direction for your particular email client. It is usually as easy as pressing a few buttons and entering the email address. Have Fun!

You May Also Like

DIY Non-Toxic Wood Stains

How to Replace a Bathroom Sink and Faucet In 30 Minutes for Less Than $100 Dollars